REVIEW – About six months ago, I switched my dog Peanut’s dry kibble made by FrontRunner to the Farmer’s Dog. A couple of friends swear by that food and say their dogs were transformed. I have to admit, Peanut, who is already a pretty high-energy dog, became even more energized. He also dropped the two extra pounds he was carrying to his recommended weight of 17 lbs. His daily deposits to the yard also became smaller due to less filler material in the food. My only issue with the Farmer’s Dog food is its price. I am paying $135.59 for twenty-eight days of Peanut’s food. I know that sounds outrageous to many folks, and it is a lot of money to spend on a pet, but he is like a child to me. I often thought of trying to make his food myself, but I have no clue what recipe to use and how much of each ingredient to put in it. This is where the ChefPaw Pet Food Maker comes in. Let’s see if it makes making my dog’s food easy and hopefully cheaper.
What is it?
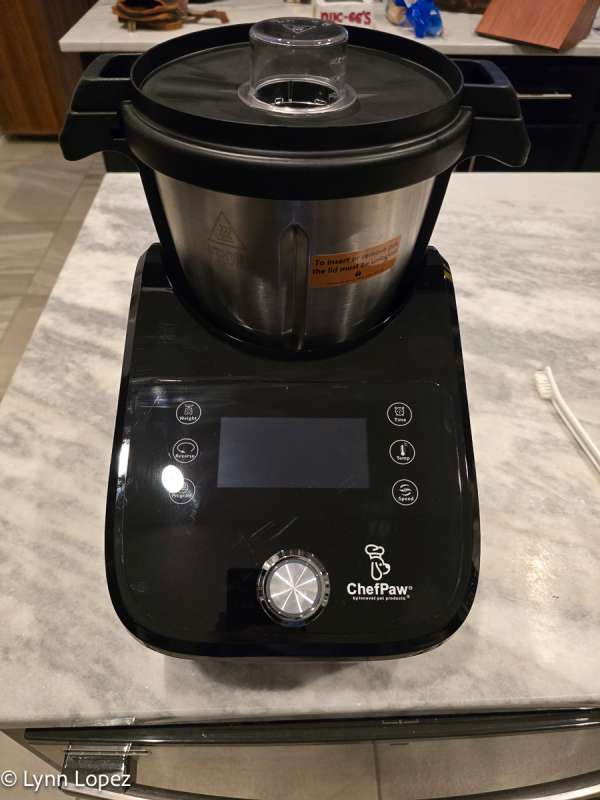
The ChefPaw Pet Food Maker is an all-in-one pet food cooker with a built-in scale and food processor. You add all of the ingredients for your recipe to a single bowl, where they are chopped up and cooked. The cooker even has a self-cleaning function to help you clean it up afterward.
What’s included?
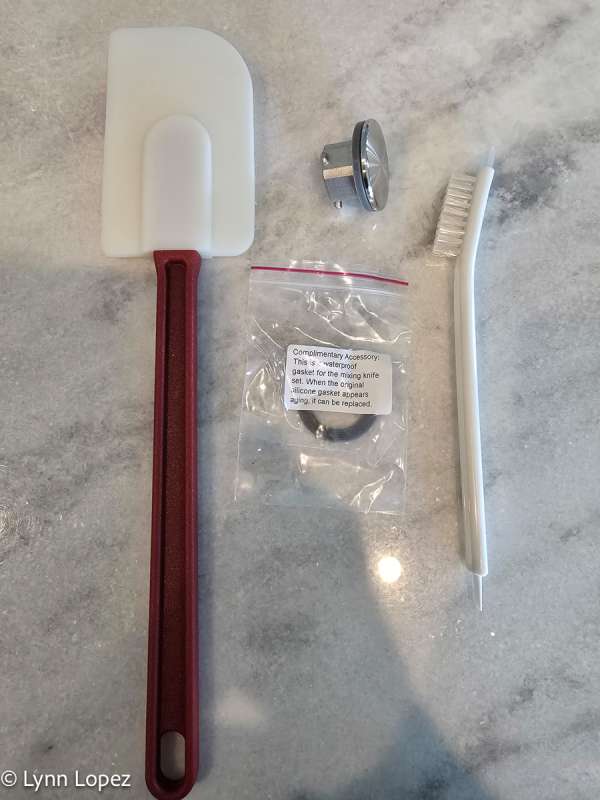
- User Manual – not pictured
- Spatula
- Cleaning brush
- Extra rubber gasket for blades
- Blender bowl plug
- Base unit
- Blender bowl
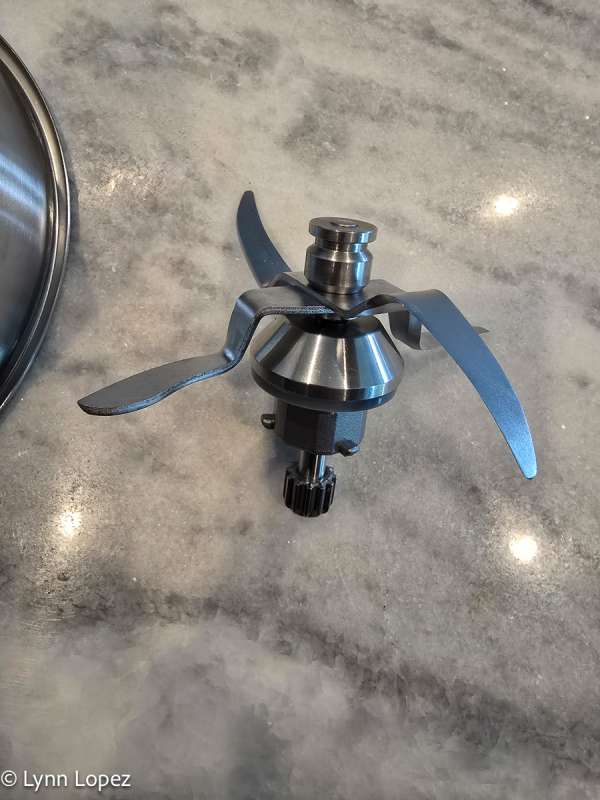
- Blade assembly – inside bowl
- Blender bowl lid
- Measuring beaker – this is also the cap for the blender bowl
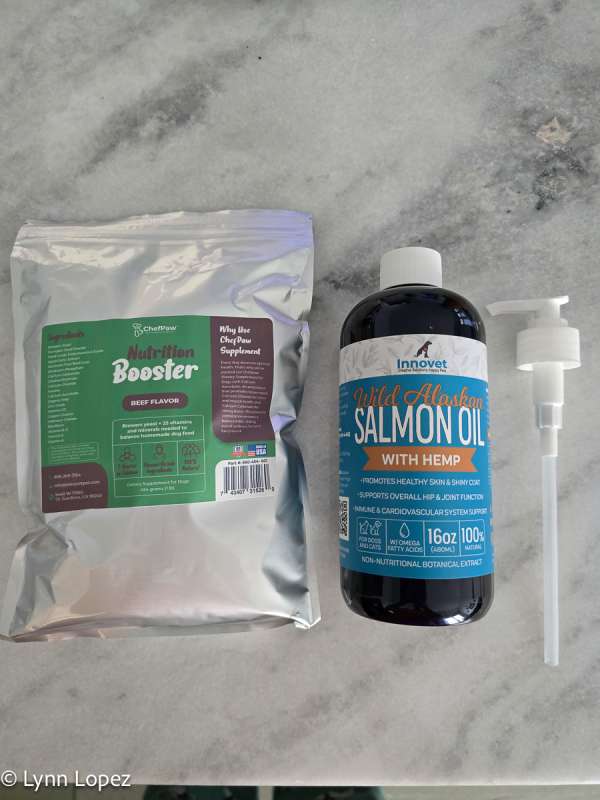
- Nutrition Booster powder – supplement
- Wild Alaskan Salmon oil with hemp – supplement
Design and features
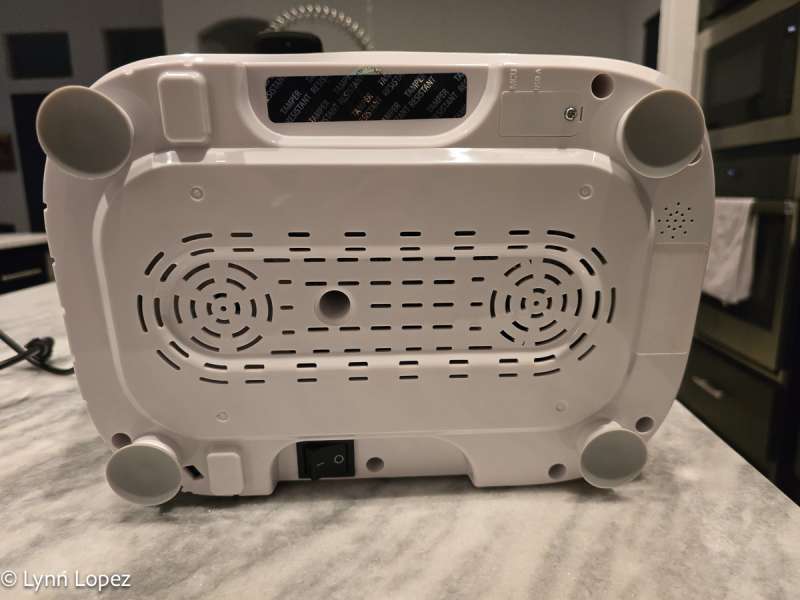
The ChefPaw is an all-in-one food processor, scale, and cooker. It has a few parts that make it up, but I find it very easy to use. The unit’s base has four suction cups that will make it stick to the counter. This is handy because when it goes into cooking mode and has to chop up large vegetables, it won’t vibrate off your counter. You can also see the on off switch is located on the right underside of the unit.

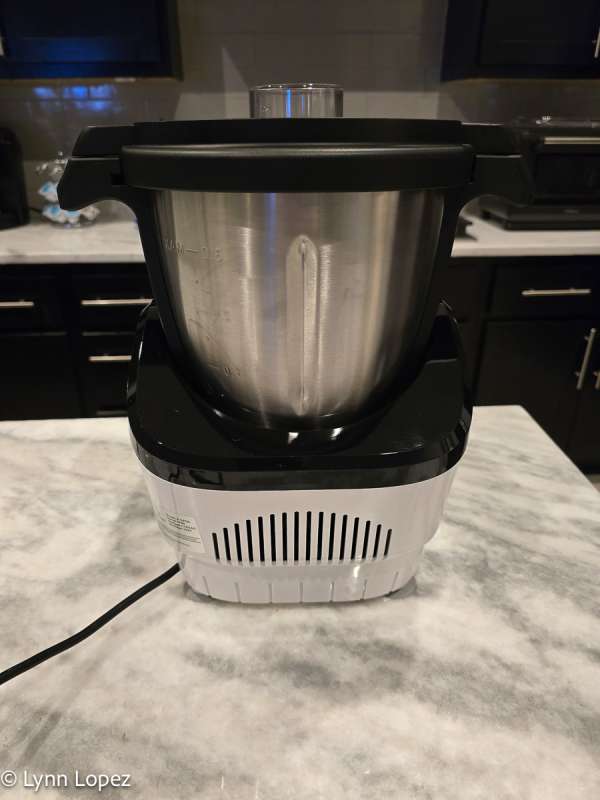
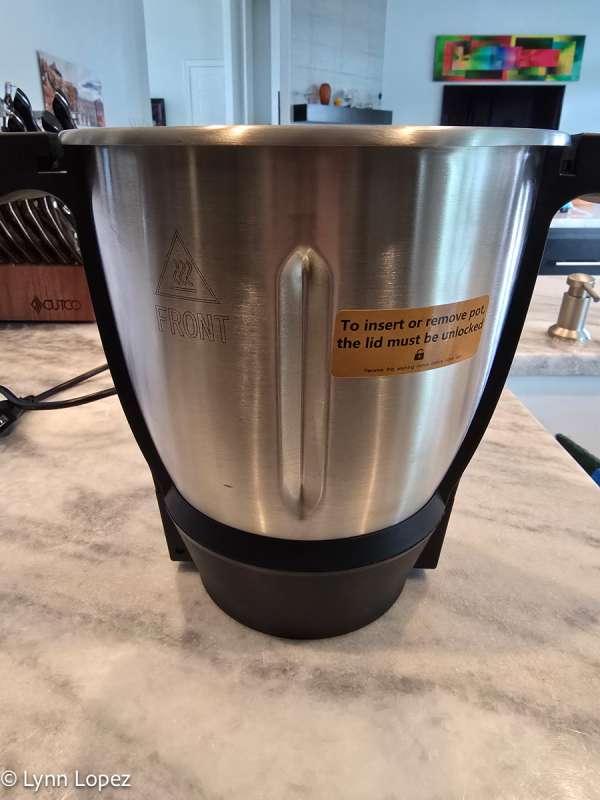
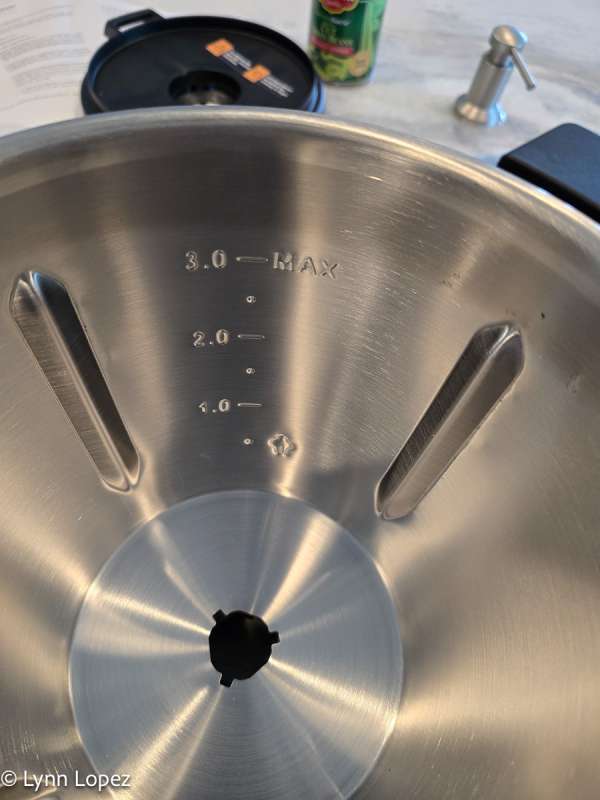
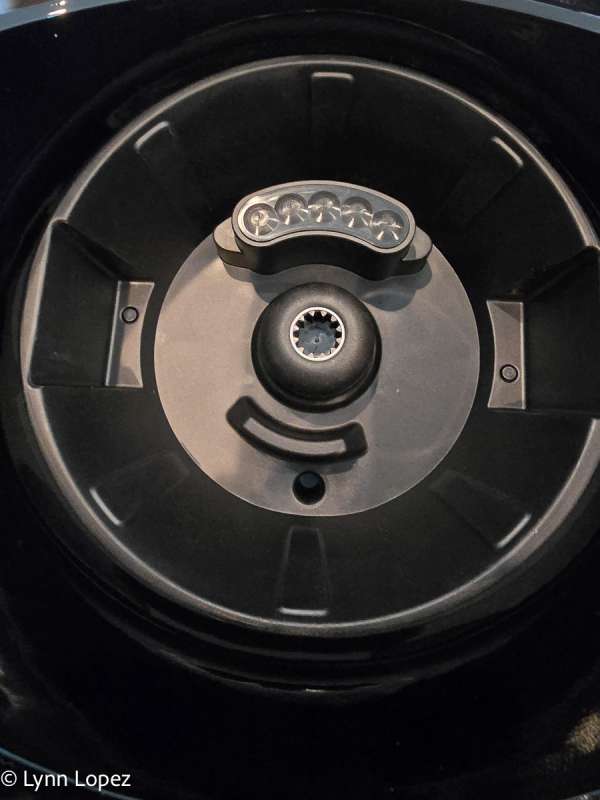
The mixing bowl is metal, but it is not dishwasher-safe. That is because it has metal contact pins that are underneath the bowl that connect it to the main unit. There are measuring indicators in the bowl. The hole at the bottom is where you can insert the bowl plug or the blade assembly. The next three pictures show the bottom of the bowl, the blade assembly, and the bottom of the bowl with the blade assembly inserted. There is a rubber o-ring at the base of the blade assembly that makes a tight seal at the bottom of the bowl. Yes, the blades are very sharp.
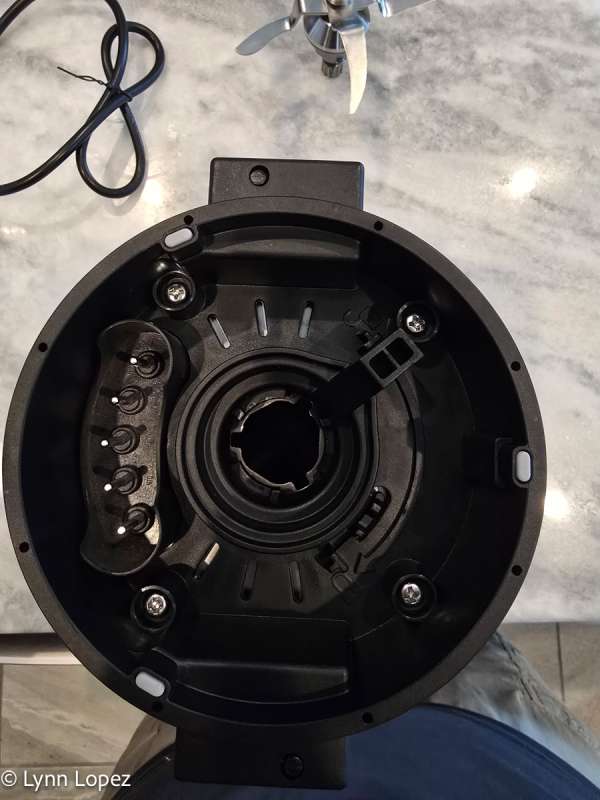
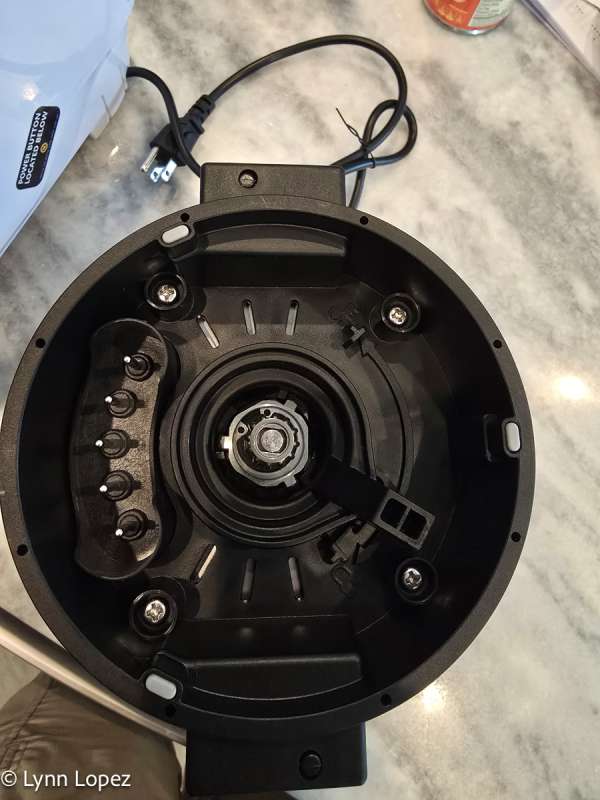
This next picture shows the inside of the base unit to which the bowl inserts. The bowl can only go on the base one way.
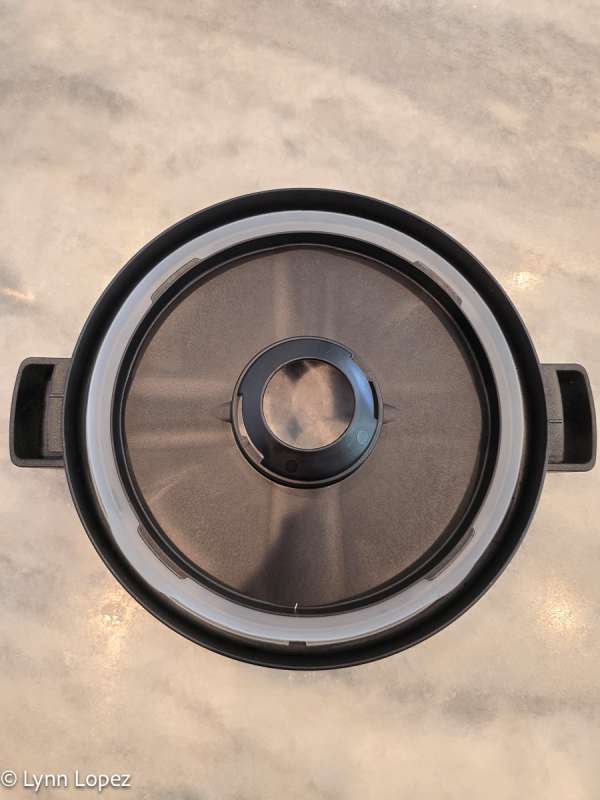
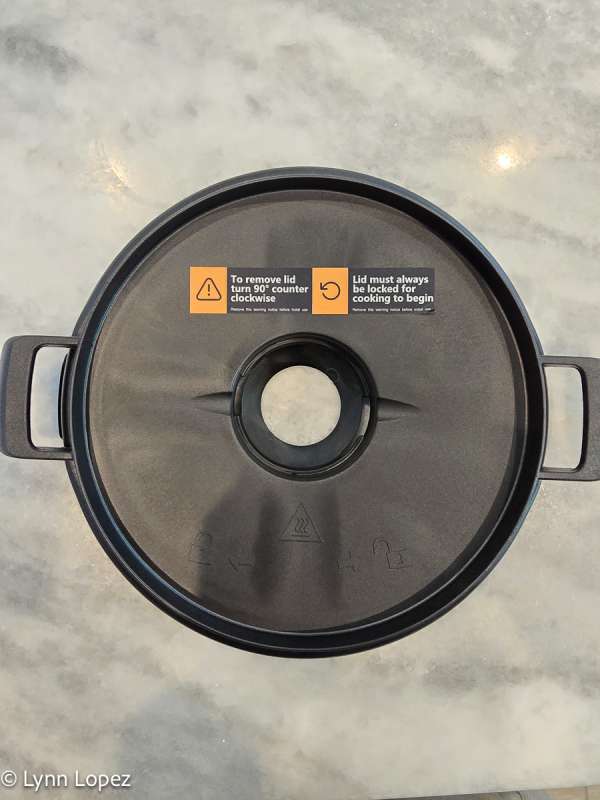
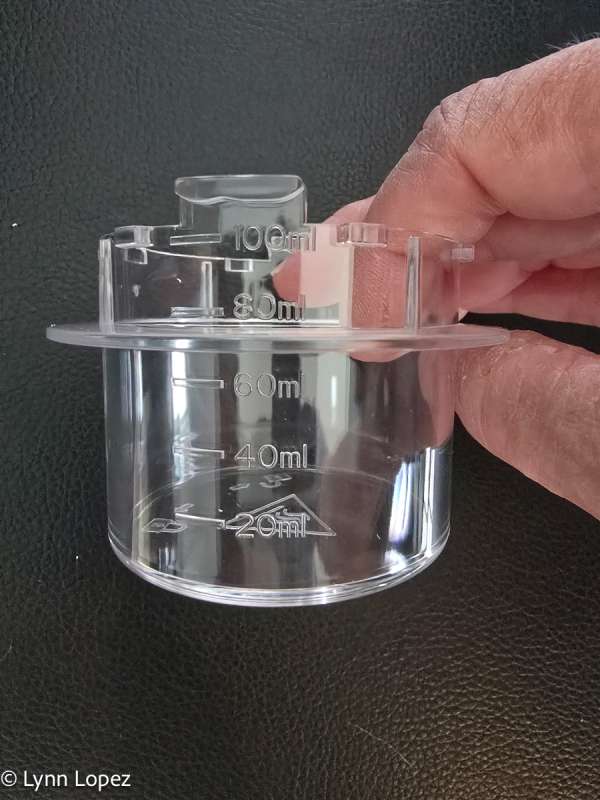
Next, we have pictures of the lid and the top measuring cup/cap. The lid is placed on the bowl and rotated clockwise to align the handles with the bowl’s handles. You cannot remove the bowl from the base without removing the lid first. The cap/measuring cup has two plastic tabs that are inserted into the notches at the top of the lid.
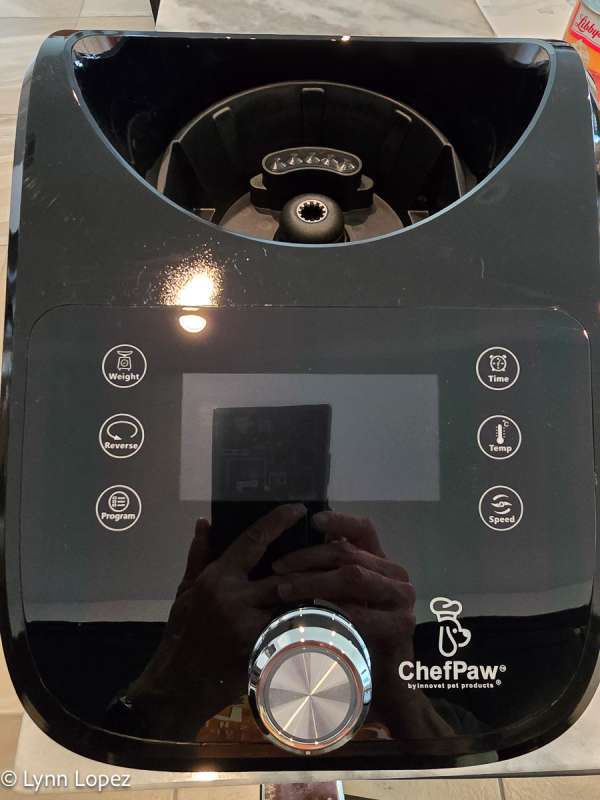
The base of the unit has six buttons. The first button is the weight button. It lets the center display act as a scale reading as you place food into the main container. Once you have added the recommended amount of one type of food, you press the weight button again to tare it and reset the scale to zero for the next ingredient.
The next button is the reverse. When you run the blades in reverse, they will not cut the food as the sharp edge is only on one side. You would use this if you you wished to keep your food whole instead of chopped up like in a food processor.
The speed button will let you adjust the speed with ranges from 1-12, however, when you set the temperature the available speeds are only 1-3. If you set the speed to 4 or higher and then set the temperature, it will automatically reset to a speed level of 1.
There are five different program modes. The various recipes that are in the app will recommend a specific program mode.
- P01 – Regular chunky, cook time 40 min at 212F, default speed 1
- P02 – Light blend, cook time 40 min at 212F, default speed level 2
- P03 – Medium blend, cook time 40 min at 212F, default speed level 3
- P04 – Fine blend, cook time 40 min at 212F, default speed level 4
- P05 – Self Cleaning, cook time 3 minutes at 131F, default speed level 8
The time and temperature buttons let you manually set the time and temperature in which you want the food to cook.
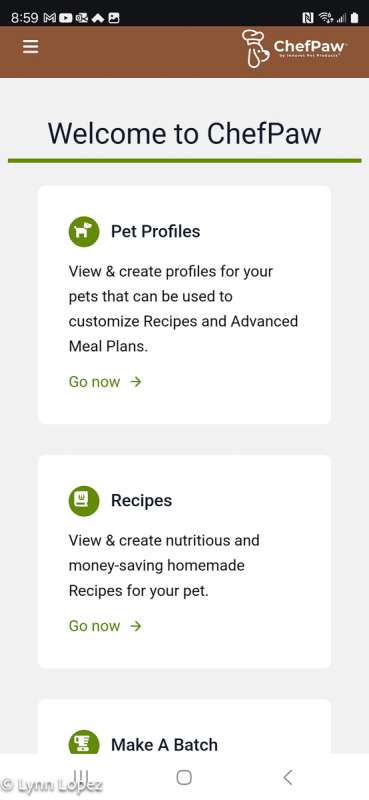
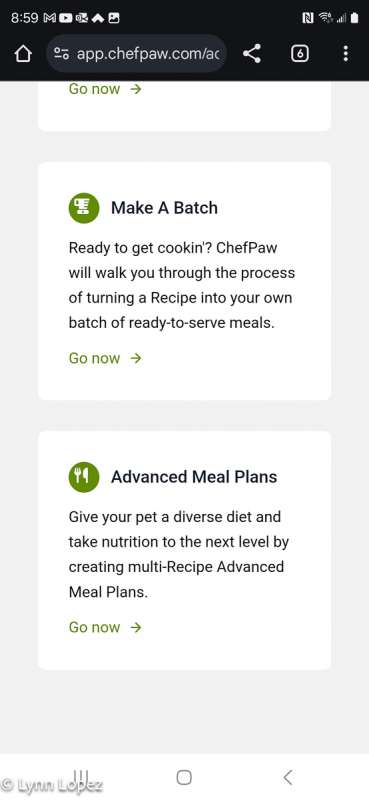
There is no app to install on your phone. All of their recipes and your account information is managed on a website at https://app.chefpaw.com/account/home. When I opened the delivery box, I found a single sheet of paper with the CEO/Founder’s business card attached to it. They had already given me a login and password to use. My login id is an email address. The website states it will use the email you used when you placed your order, and the password will be the order number. From what I can see on the website, should your email ever change, you will need to contact the company to change it as there is no way to do so on the website.
You are presented with the options below.
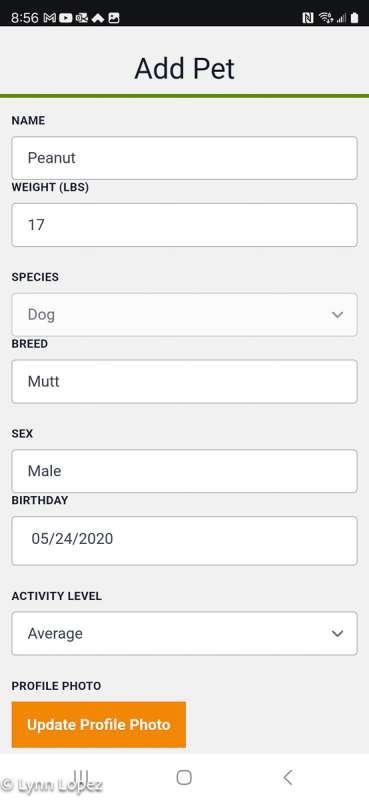
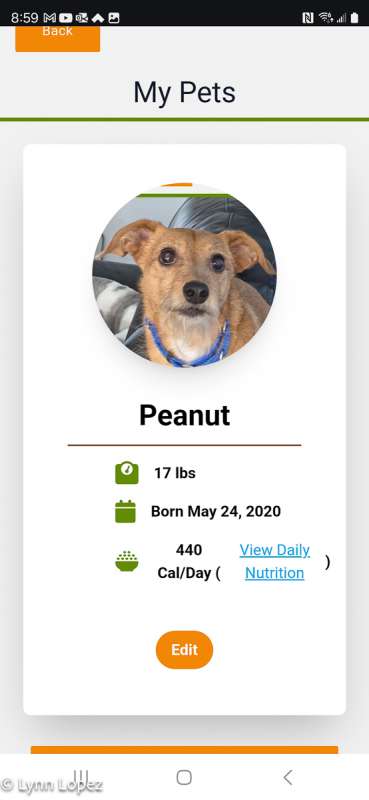
The first thing I did was to create a pet profile for Peanut. You can use an existing picture or take a a picture. The app lets you crop it as needed. Once the profile is created, it calculates the daily calories needed.
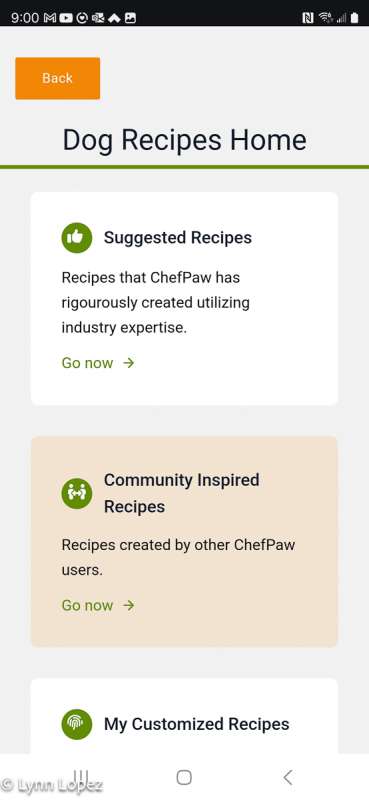
When you go into the recipes section, you are presented with multiple recipe options. I started with a suggested recipe, and I will discuss that more later. The community-inspired recipes section lets you share any of your recipes with others and see others’ shared recipes. The My Customized Recipes lets you create your own recipe or start with an existing recipe and modify it to meet your pup’s needs.
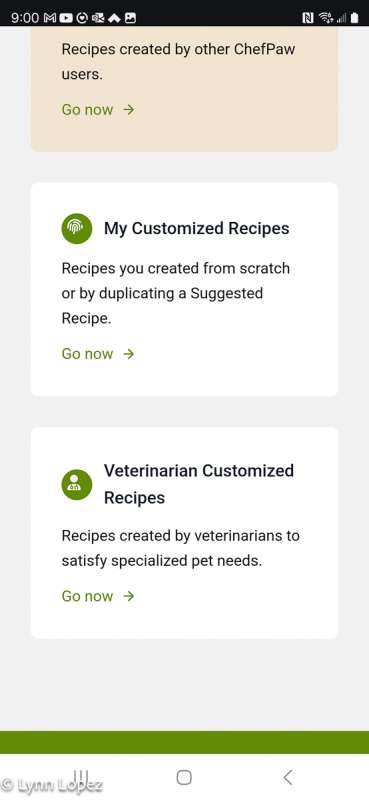
If your dog has some special dietary needs, you can also choose to have a customized recipe created for your dog by their veterinarian.

The suggested dog recipes have several different sections based on your dog’s needs. The screenshots below show all of the options available. I think this is a really nice feature. So many dogs seem to have allergies these days. They also accommodate senior dogs, puppies, and other needs. I chose a recipe from the adult section for Peanut, who is just over four years old. He is pretty active but manages to be a good beggar at the table, so I did not pick the active small dog choice.
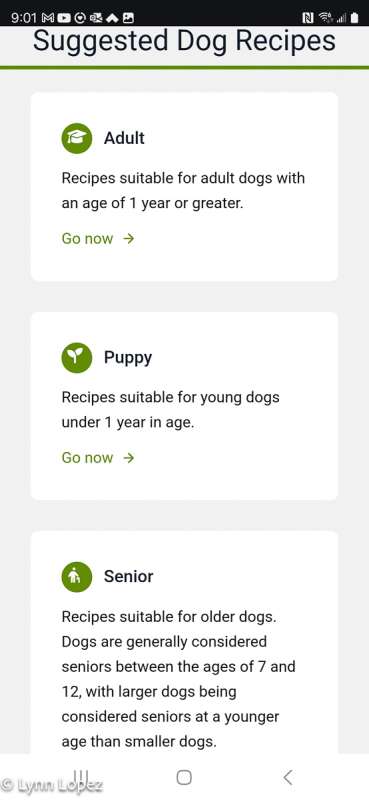
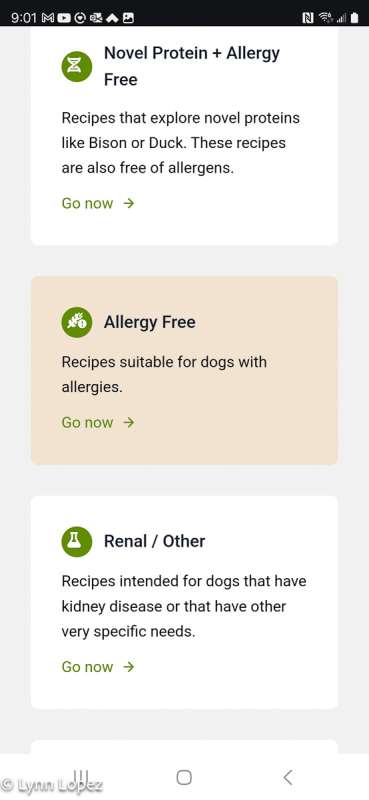
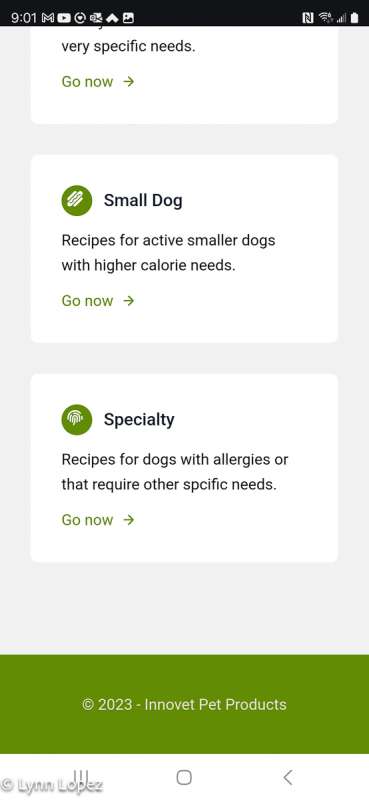
There are many available recipes in each section. The screenshots below show the available options in the adult dog section. The recipe actions are: view, edit (this is where you duplicate the recipe and customize it yourself), and nutrients per batch.
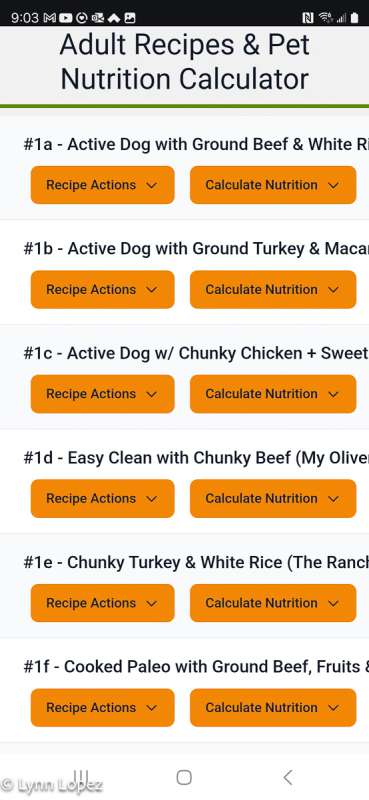
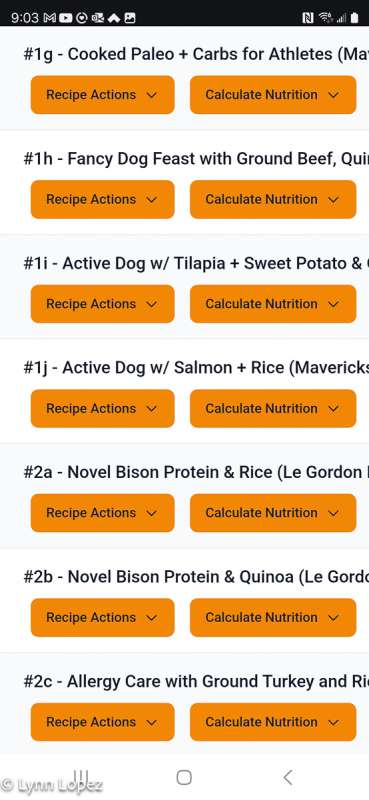
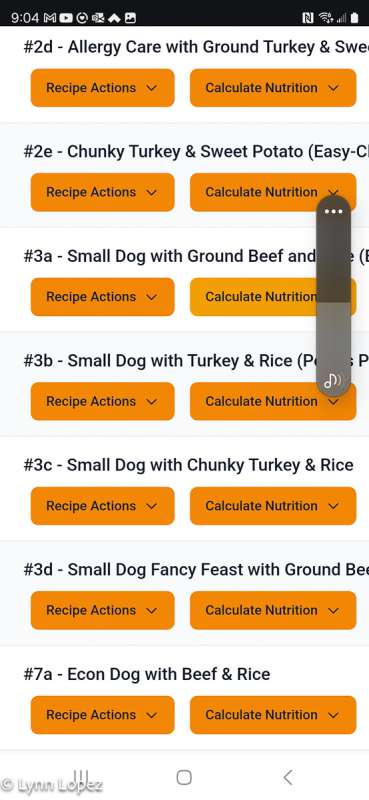
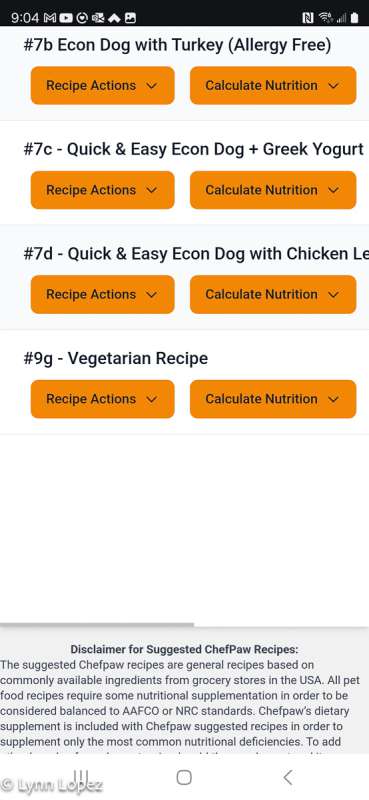
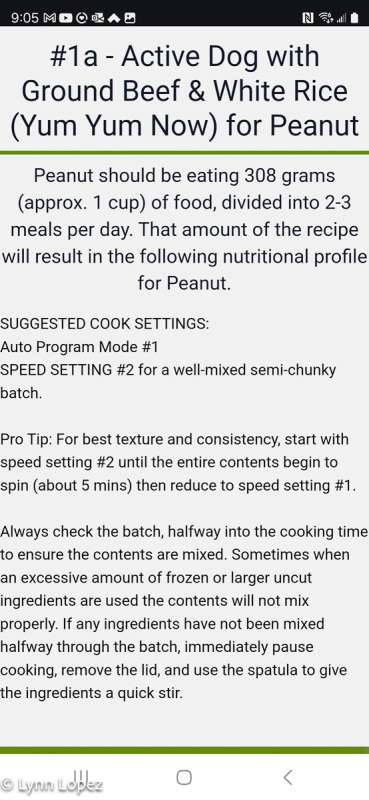
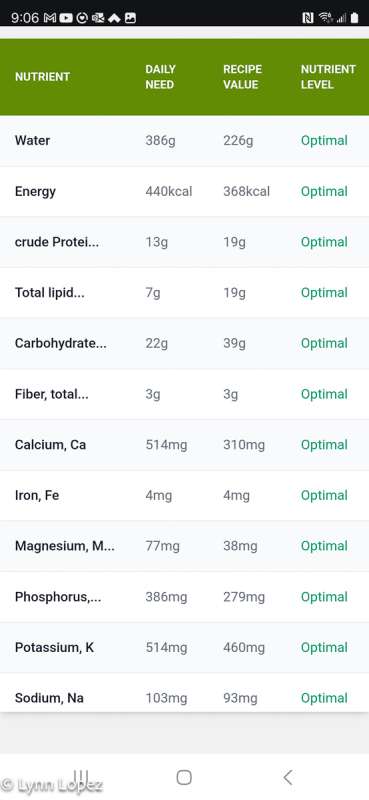
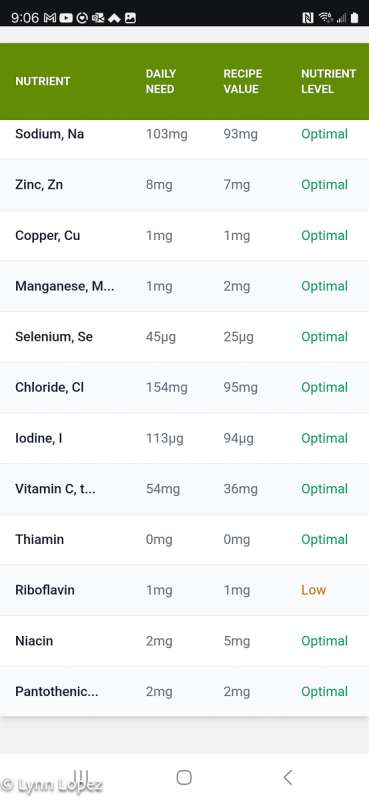
Clicking on the view gives you an overview of the recipe. It also gives you a button to get a grocery list. Then there is the button for cook now, which will take you step by step through making the recipe. Just below that overview is a video showing the recipe being made (I have a link in the performance section of this review) and the nutrition information.
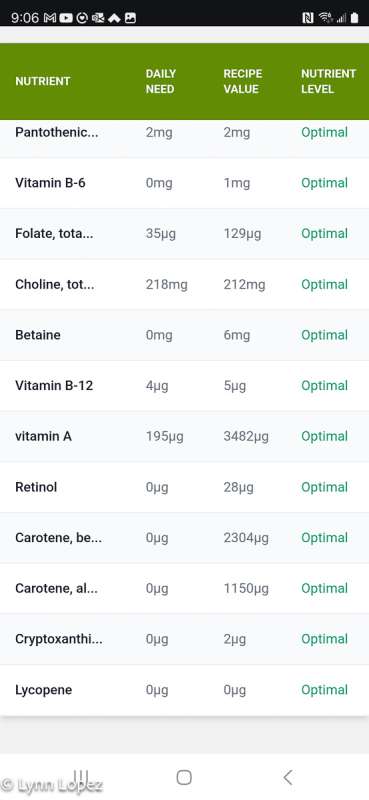
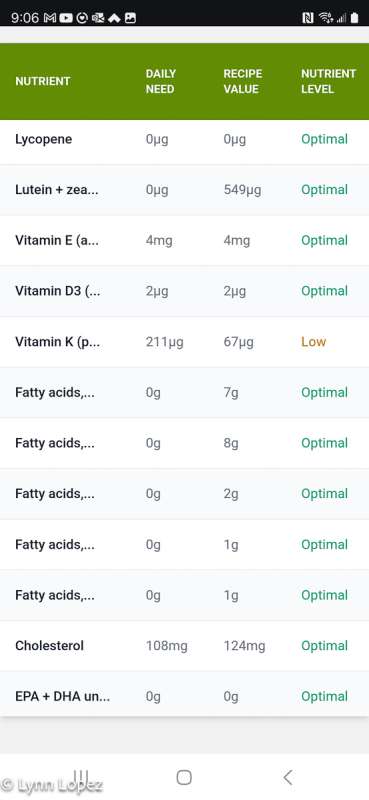
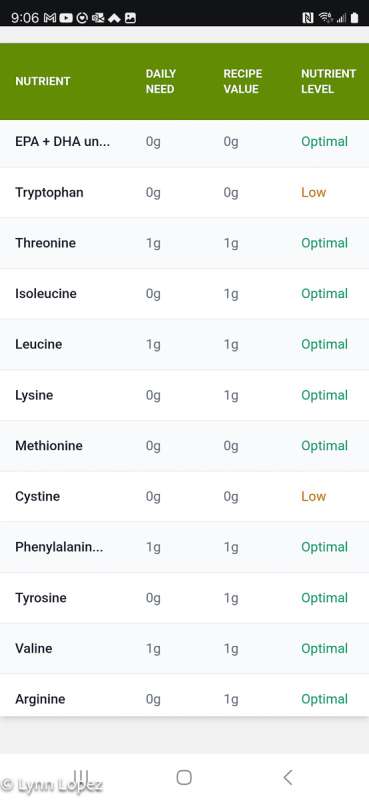
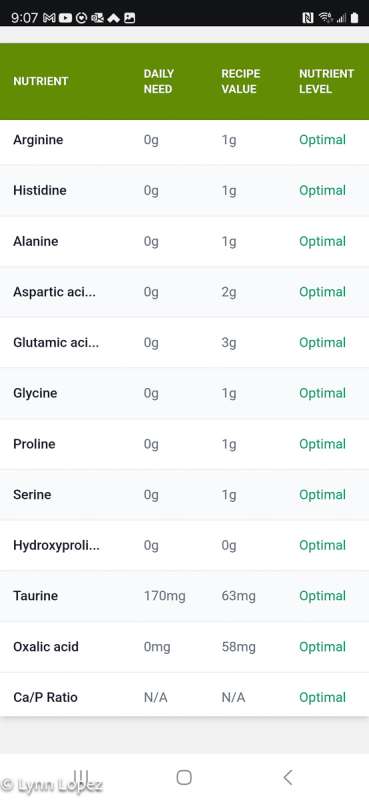
Performance
Since Peanut has been eating a beef recipe from the Farmer’s Dog, I decided to cook the #1a – Active dog with ground beef and white rice recipe. I used the handy shopping list provided by the website and got everything I needed. I cleaned the bowl and lid with soap and water and then mounted it to the base unit. I turned it on and pressed the scale button. It set to zero and is in grams. I clicked the cook now button and was presented with this disclaimer:
- Cooking dog food is not an exact science, it’s really a mixture of science & art. Units in the ChefPaw app are measured in precise grams, however when it comes to cooking, precision is very difficult, so it’s important to remember that there is some margin for error. It’s totally fine if you accidentally add a little too much or are a little short of 1 ingredient. However, a little too much of all the ingredients could lead to overfilling. It is critical to not overfill the unit.
- The Chefpaw model CP3A should not be filled above the 3.0 Liter max. Overfilling can result in parts of a batch being undercooked or excessive pressure building up. If the unit is overfilled and hot, assume that excess pressure is under the lid, so do not attempt to open the lid until the unit is unplugged and the mixing bowl has cooled down to room temperature. Excessive pressure or improper use can lead to severe injury.
- ChefPaw is NOT a toy and should not be left unattended especially while in use and it should never be touched by children or pets. Chefpaw has moving sharp metal parts and Chefpaw food recipes will look and smell attractive to pets and children, therefore extra caution must be used to prevent pets or children from coming into contact with the Chefpaw machine especially while it is in operation.
- Never let a pet eat directly out of the Chefpaw mixing bowl due to the sharp edges.
- ALL food must be allowed to cool to room temperature BEFORE feeding it to your pet. If given the opportunity, Pets will often eat food that is too hot, which can cause serious burns and injury.
That first note on weights not needing to be exact is a good thing. The scale was a little slow to respond. I needed to add food and wait a few seconds to make sure the scale registered a weight. I did enjoy being able to use the scale for each ingredient. After each step, I pressed the scale button again to tare it back to 0 for the next ingredient.
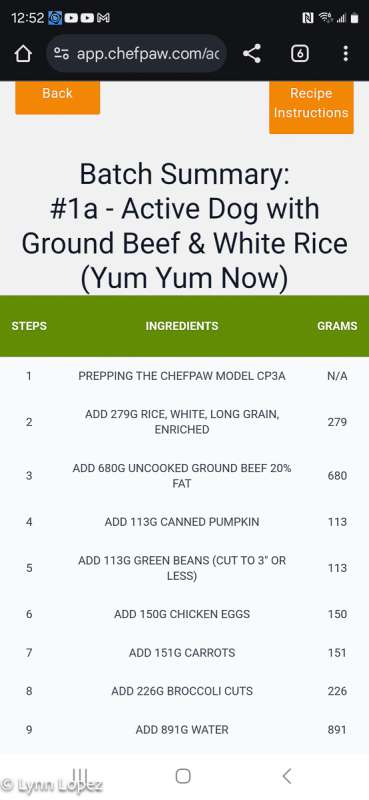
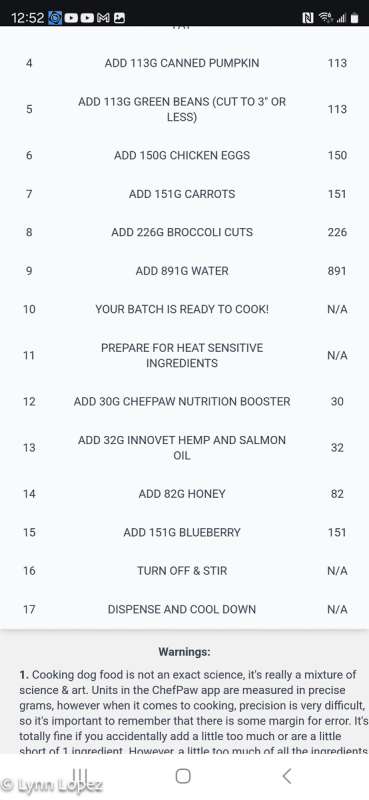
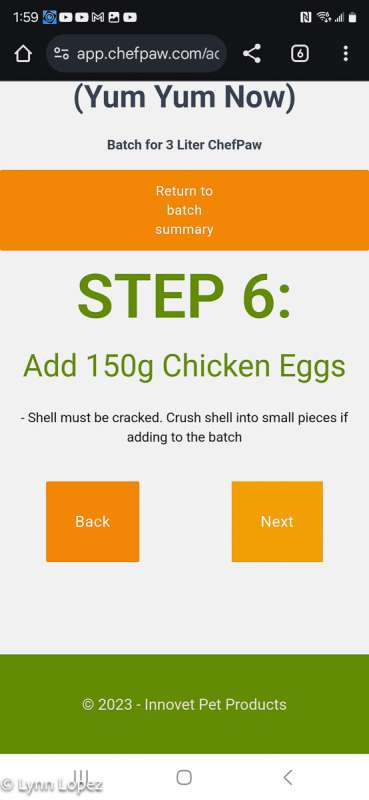
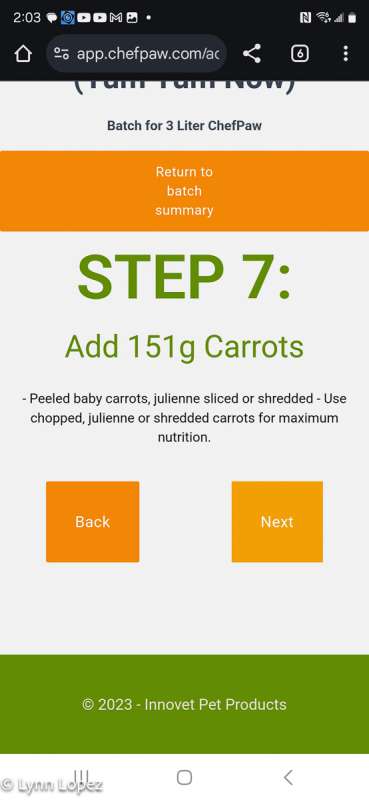
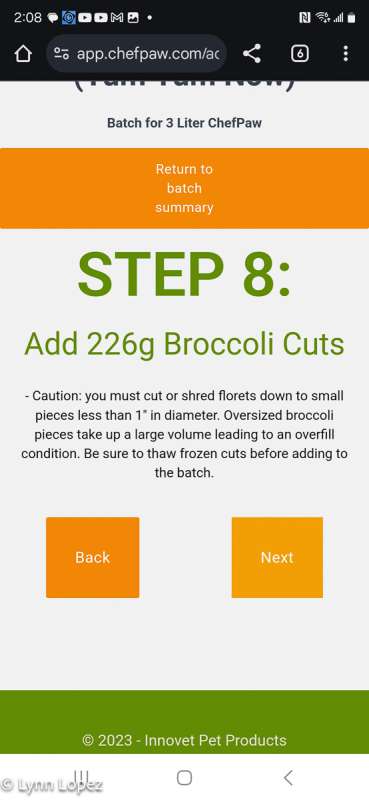
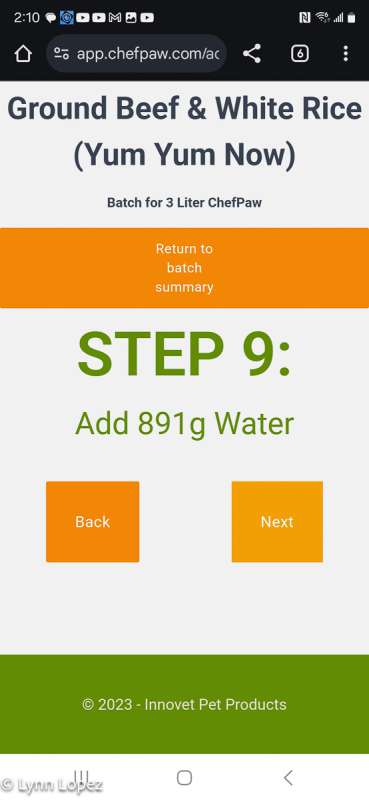
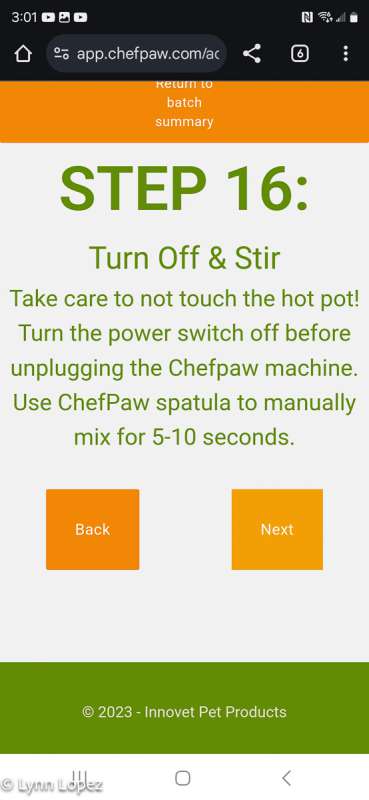
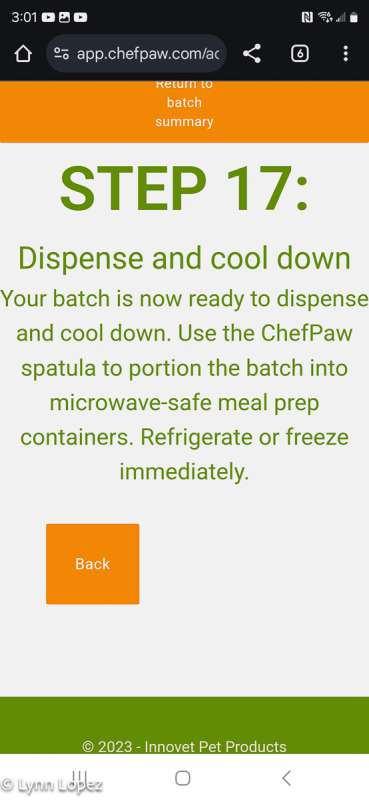
The following screenshots show you all of the steps I went through before the cook step. The first two are an overview of all of the steps in the recipe.
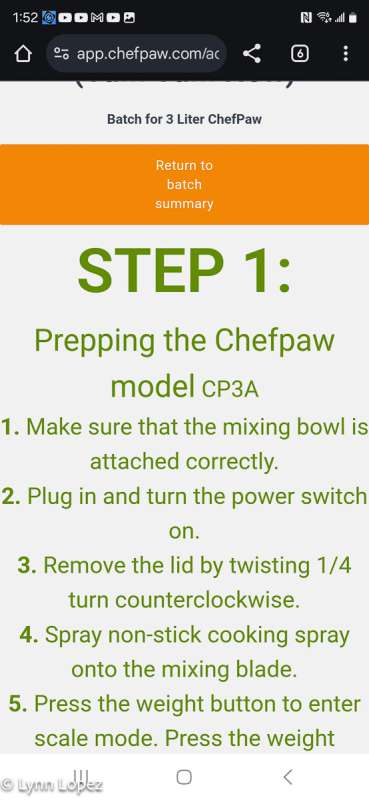
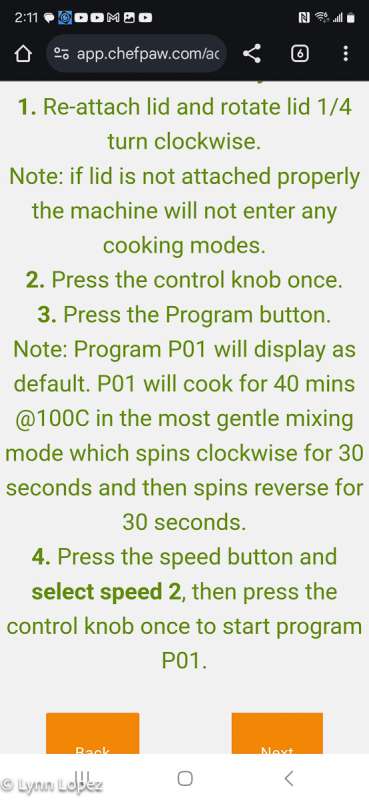
Then you click the recipe instructions and it takes you through step by step.
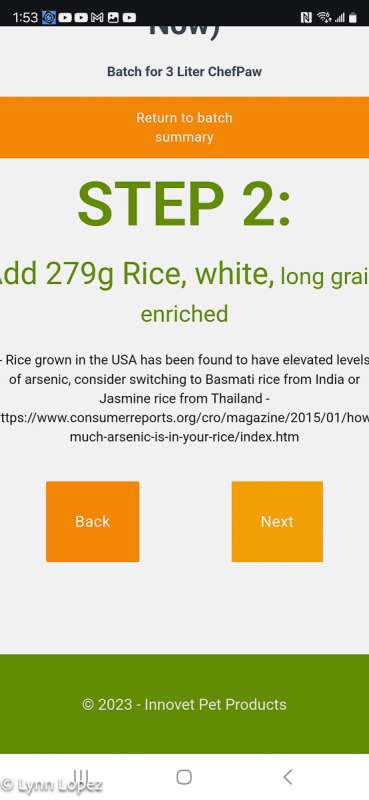
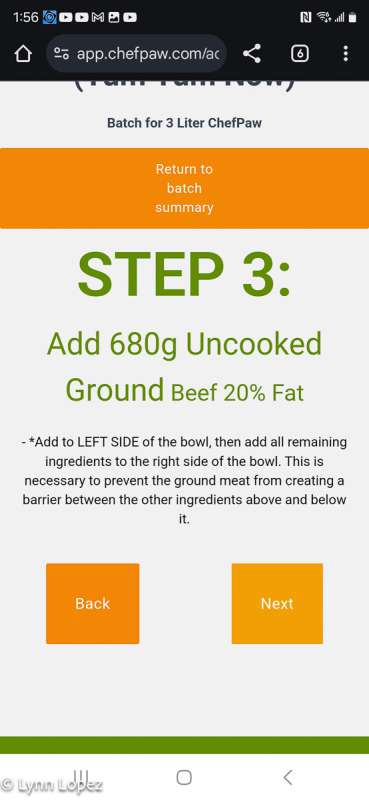
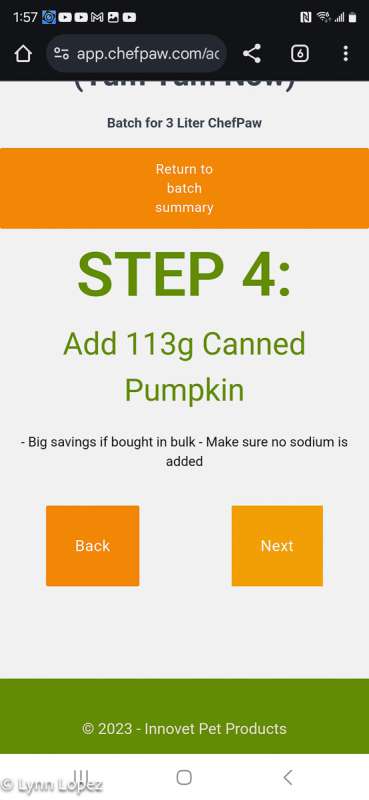
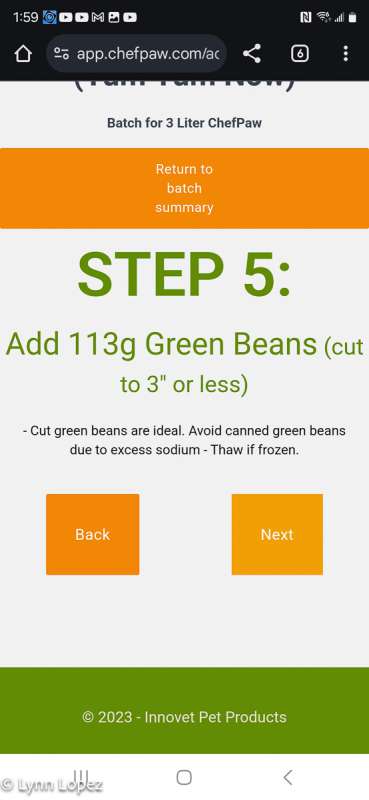
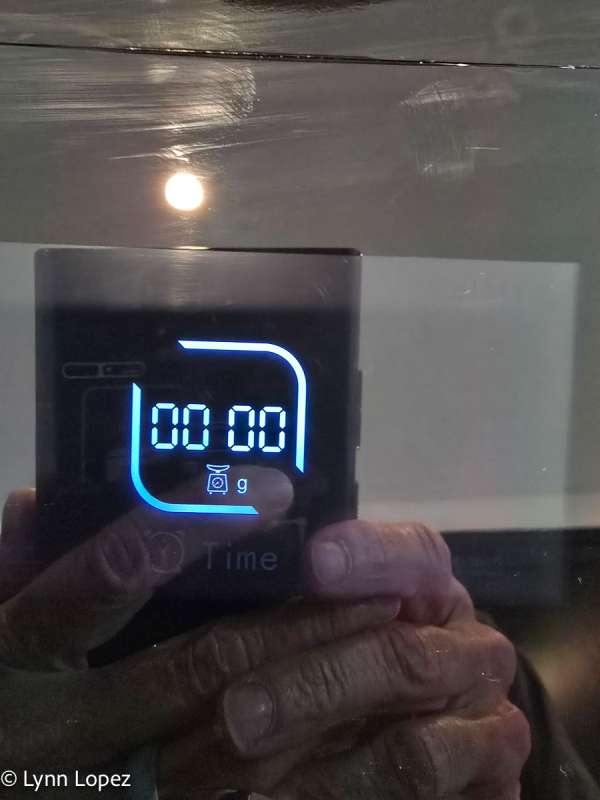
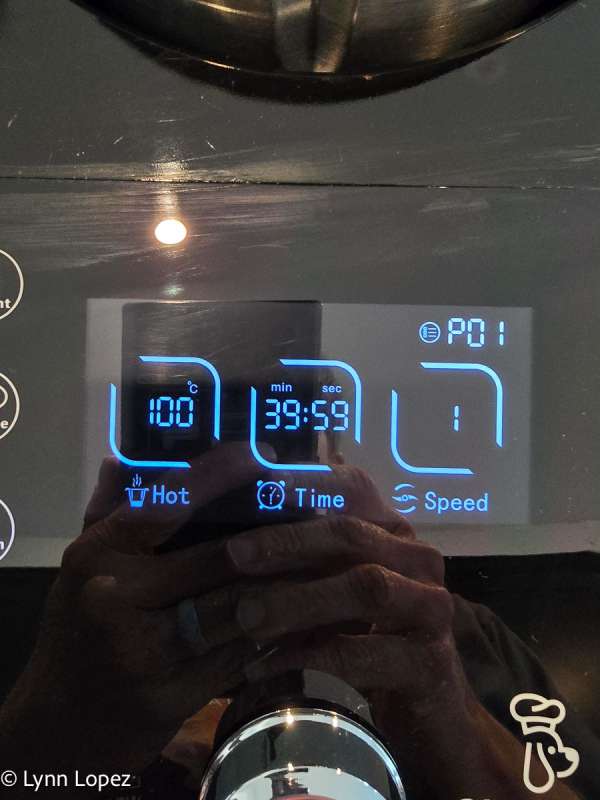
Here is a screen shot of the Chefpaw display when cooking.
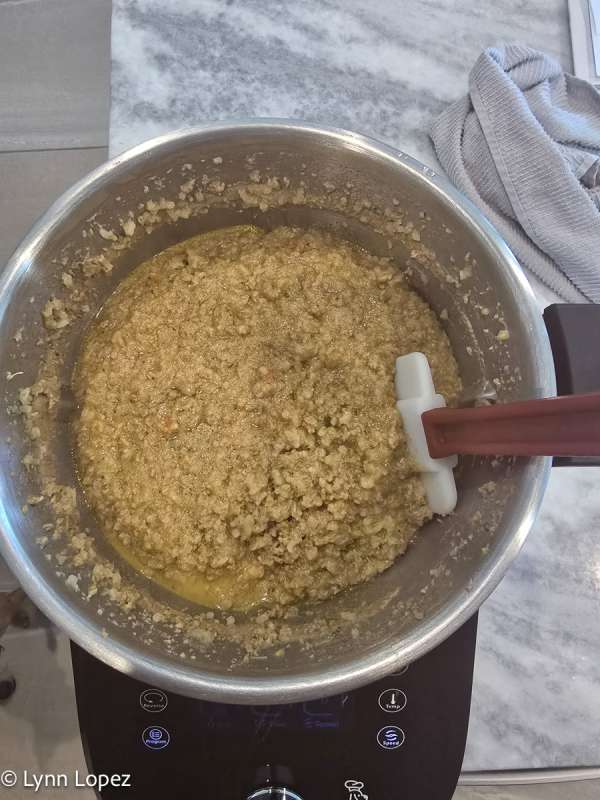
This is what the food looked like after the cooking cycle was complete after 40 minutes. I did not take a picture of everything in the cooker before I started, and I wish I had. I had chunks of broccoli and carrots. It was nicely chopped up when the cooking was complete.
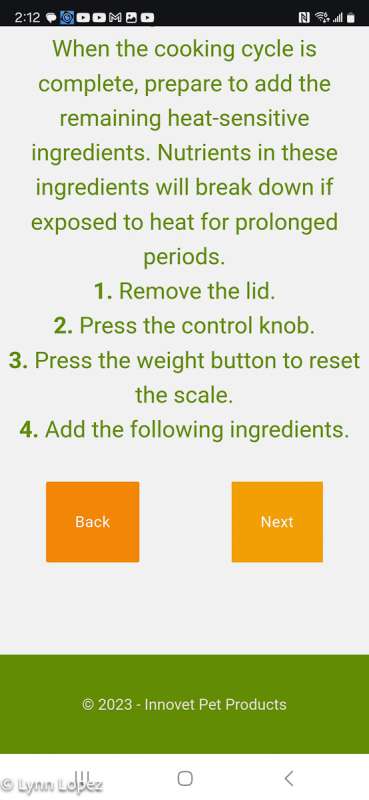
Once the cooking cycle was complete, I added the heat-sensitive ingredients.
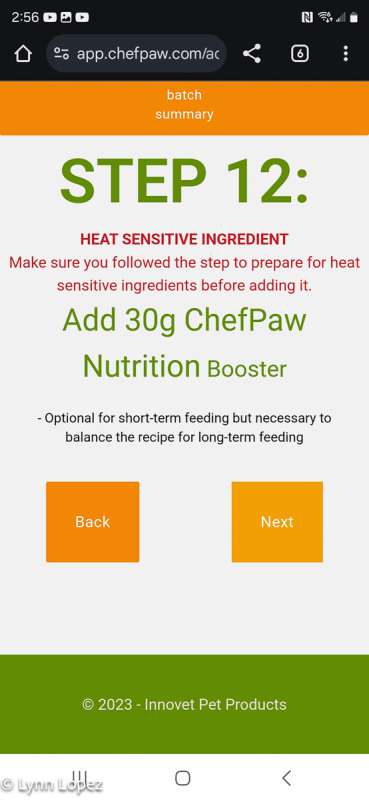
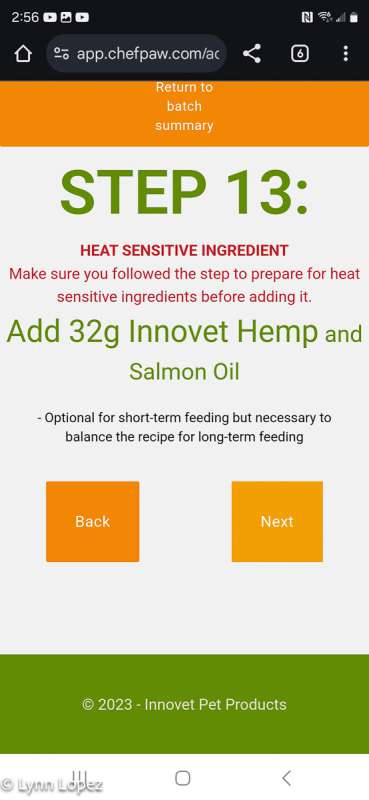
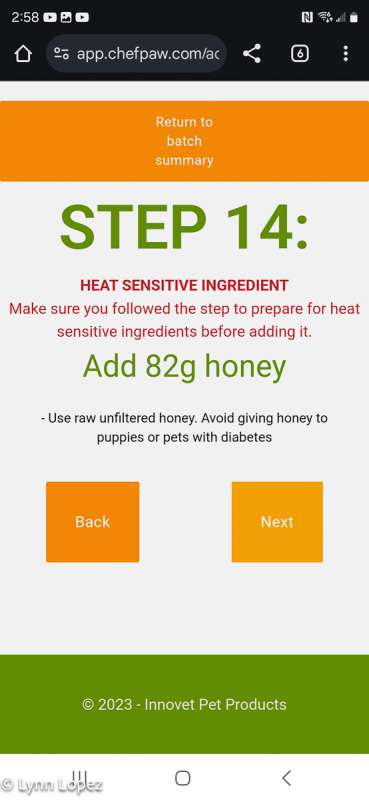
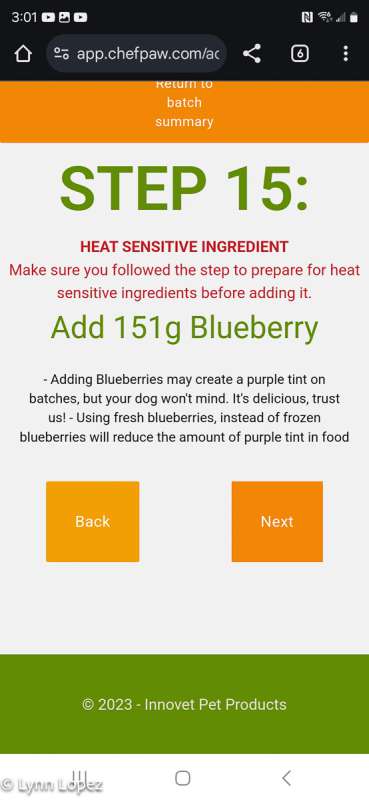
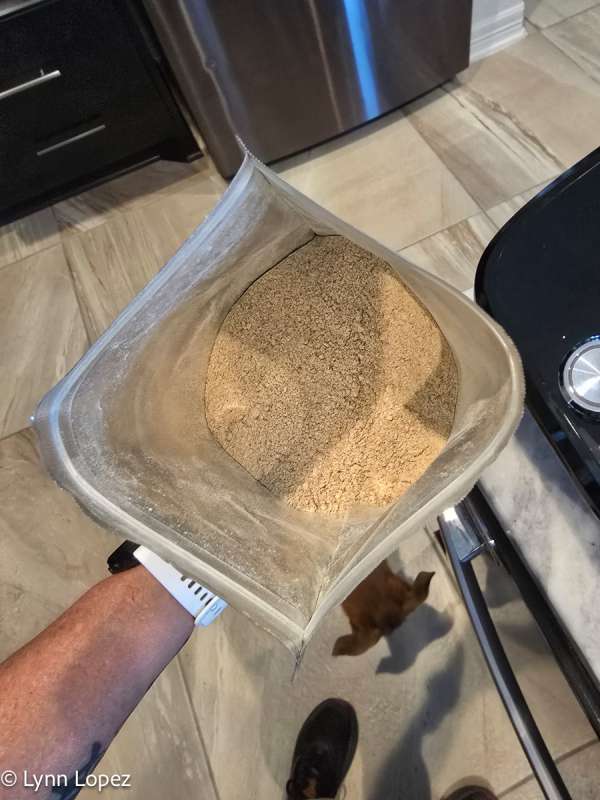
This is a picture of the nutrient booster. It is in powder form.
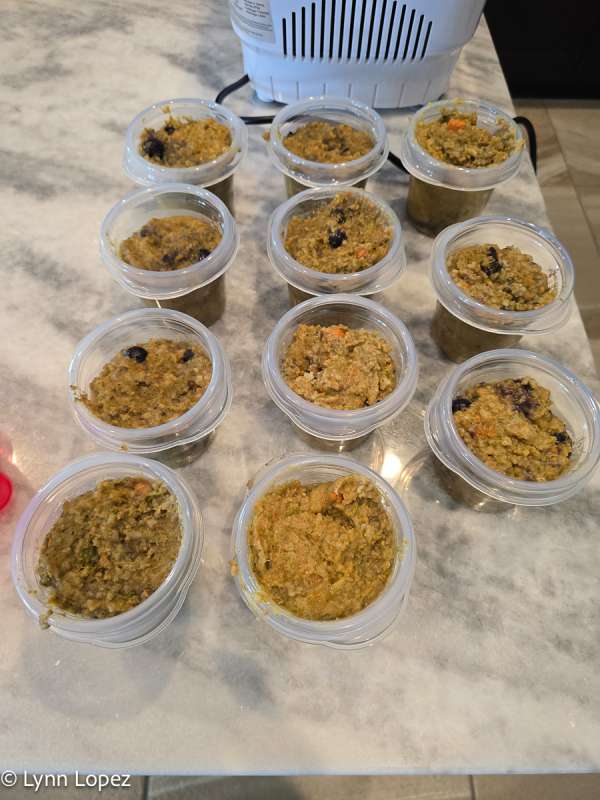
I then dispensed the food into some reusable one cup containers since that was the amount specified for Peanut. I ended up with right at 11 and 1/2 cups. I am pretty sure the next time I fill the cups, I won’t fill them quite as full and get a full 12 cups. That was all from a single batch. I left two cups out and put the rest in the freezer.
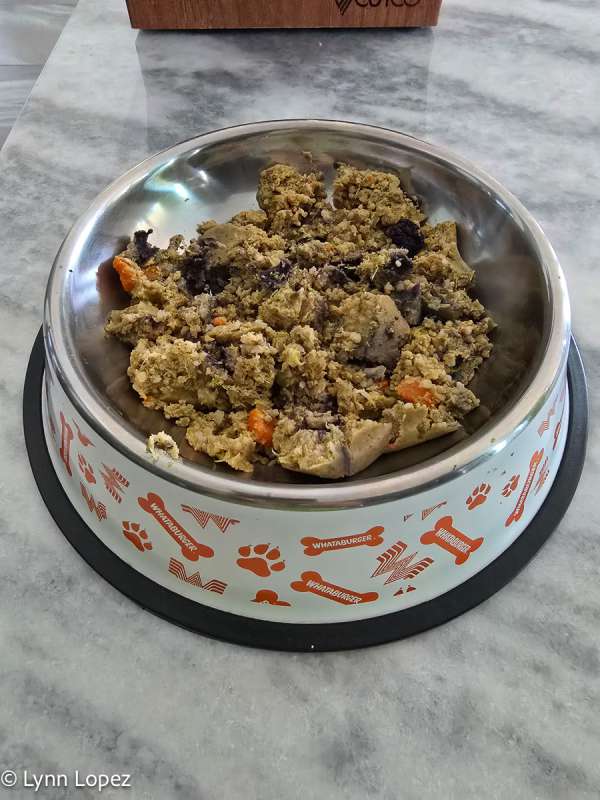
Here is what the food looked like after placing it in his food bowl and spreading it out. It is definitely a larger portion than what he gets from the Farmer’s dog. I would say the Farmer’s dog portion is about 3/4 a cup.
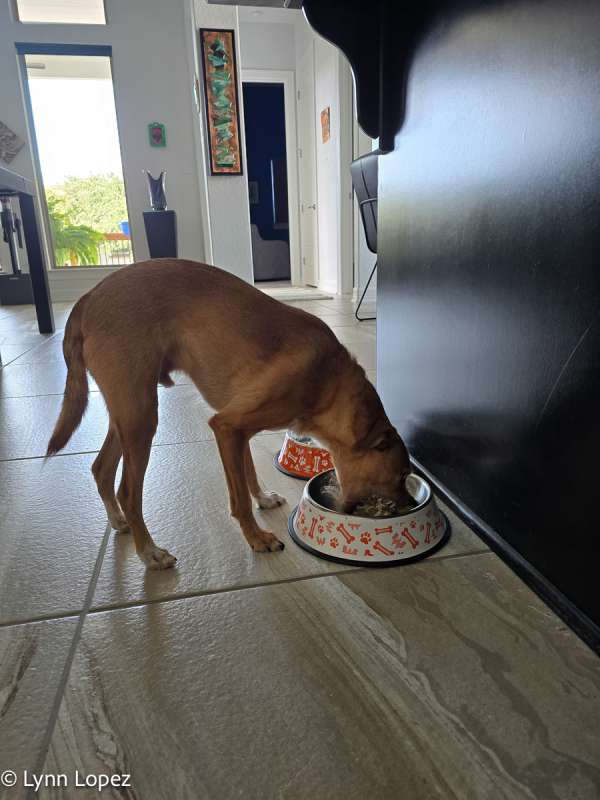
Peanut is not a picky eater, but man… I have never seen him open his mouth this wide to eat before. We adopted him at 8 weeks and he came from a litter with 6 other siblings. I am not sure if he had to fight for his food, but compared to my previous shelties, he eats like he has been starving for days!
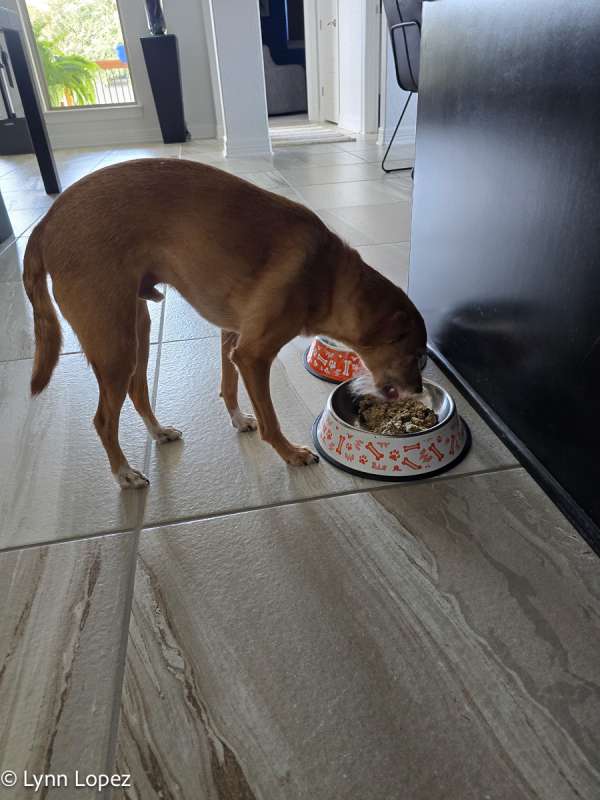
Going forward with the food, since I had it in those one-cup containers, I had to have at least three cups sitting in the fridge to defrost in time to feed him the next day. So I always grabbed another from the freezer and put it in the refrigerator to defrost for two days.
Overall, Peanut loved this food. It was pretty easy to make, and the only things that got dirty were the bowl, lid, and blade from the ChefPaw. The unit has a clean mode, but I just hand-washed the bowl, and it was super easy. His bowl movements changed to a slightly darker color, which I attribute to the blueberries, but they were no larger than they had been under the Farmer’s Dog and still smaller than when he was on kibble. His energy level is still the same.
Now for the cost. Everything for this one batch cost me between $12.50 and $13.00, which comes out to around $1.18 a serving compared to $4.82 a serving from the Farmer’s Dog. In the future, I can save even more money by buying some of the items like the green beans, pumpkin, rice, and beef from a store like Costco.
What I like about ChefPaw pet food maker
- Everything is made in one pot!
- A built-in scale makes it easy to make the recipes.
- They have a great website with many recipe options for any type of dog.
- You can even have a veterinarian create a custom recipe if you want to pay for it. The cost is $250 for a 60-minute consultation or $50 for a diet formulation by questionnaire.
- They sell nutrient boosters for your recipes.
What needs to be improved?
- The unit is quite pricey.
Final thoughts
If you are already using a service like the Farmer’s Dog and want to keep your dog on fresh food, this will be a great way to save money. The nutrient booster costs $30.90 and will make 15 batches of food, which comes out to .19 cents a serving. This still keeps the cost way below the cost of subscribable fresh pet foods. The ChefPaw is pricey at $599, but you will make your money back and still feed your dog great food. If you have a larger dog or multiple dogs, you will make your money back on this unit quickly. I think the main thing to ask yourself is if you would be dedicated enough to take the time to shop and make the food yourself. The ChefPaw makes the job as easy as possible, but it will still take at least an hour to shop and make one to three batches of food. The next time I make food, I will do two batches at a time.
Price: $599
Where to buy: ChefPaw
Source: The sample of this product was provided for free by ChefPaw. ChefPaw did not have a final say on the review and did not preview the review before it was published.
